Replacement of the spindle
Replacement of the spindle
Prerequisites
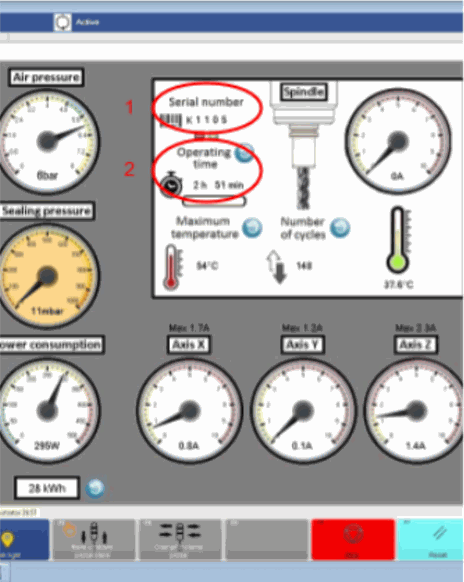
Record the spindle operating hours ("CNC" screen) and the serial number (Kxxxx) of the spindle to be removed.
Read the serial number engraved on the side of the new spindle.
The Z axis should be positioned as low as possible.
The door to the machining area must remain open.
The machine must be powered off.
The rear cover must be removed (link).
The top cover must be removed (link).
Mark the angular position of the spindle with a felt pen in order to identify its position and to avoid rotating it in its housing.
Precautions

The system must be powered off..
Removing the cover exposes people to the risk of pinching and crushing by moving mechanical parts.
Removing the cover exposes people to the risk of electric shock.
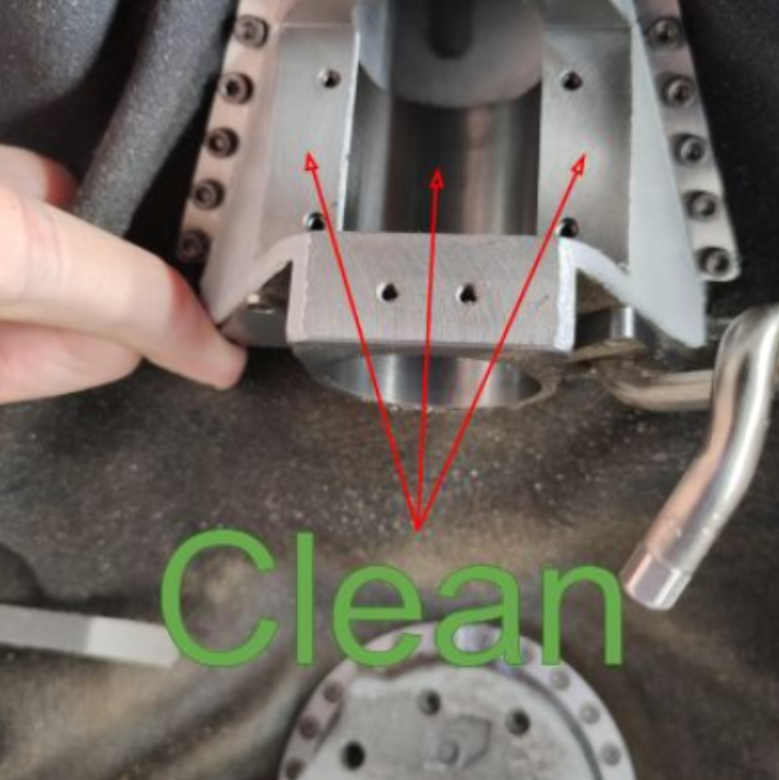
Avoid contamination of the spindle mounting slot:
The machining area must be clean: Vacuum all machining chips in the entire machining area, including the upper part. Clean the work area with a brush and vacuum cleaner. Avoid rubbing the transparent parts (polycarbonate) as this may scratch them.
The machining area must be dry: Remove residue from the entire working area, including the upper part, by dabbing with a soft cloth. Avoid rubbing the transparent parts (polycarbonate) as this may scratch them.
Make sure that the spindle housing is perfectly clean and dry before mounting it.
Never rotate the spindle in its housing Rotating the spindle in its housing or inserting it incorrectly will cause the temperature sensor's connecting wires to be cut.
Handle the spindle with care. Handle with care, avoid shocks, avoid pulling on flexible connections and cables.
The connectors are non-removable.
After the spindle is removed, the spindle height must be measured and corrected (link).
Procedure
Disassembly
Electrical cabinet
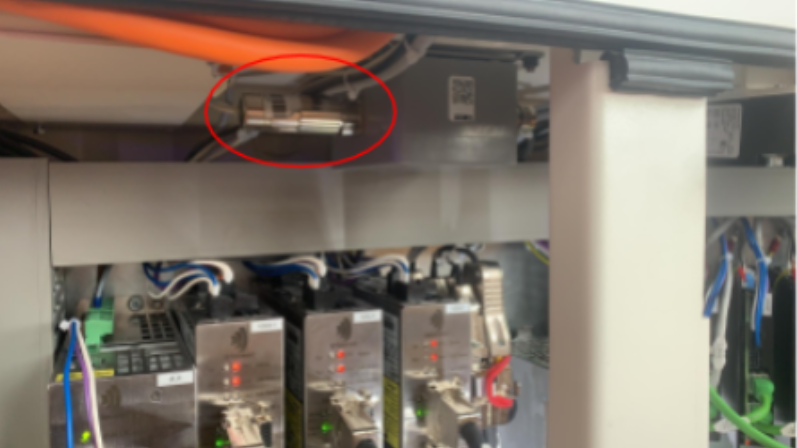
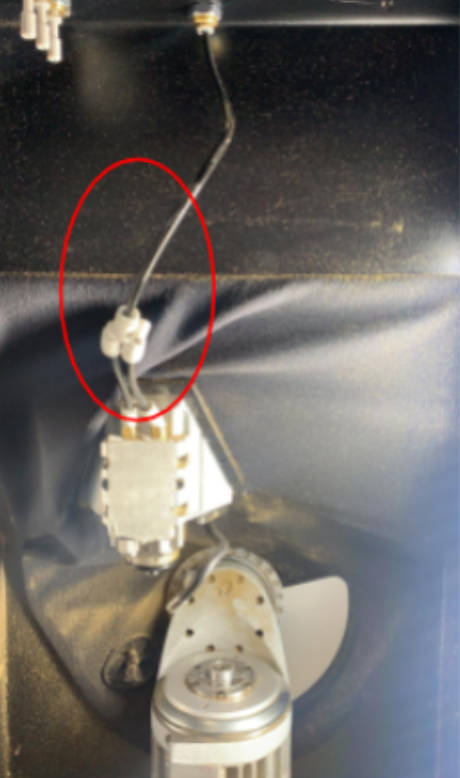
1. Open the control cabinet, locate the signal converter box and disconnect the -XXX interface by unscrewing the locking ring and pulling the connector.
Do not pull on the cable..
The connector cannot be dismantled..
Rear part of the machining area
2. Disassemble the feedthrough and remove the cable and connector.
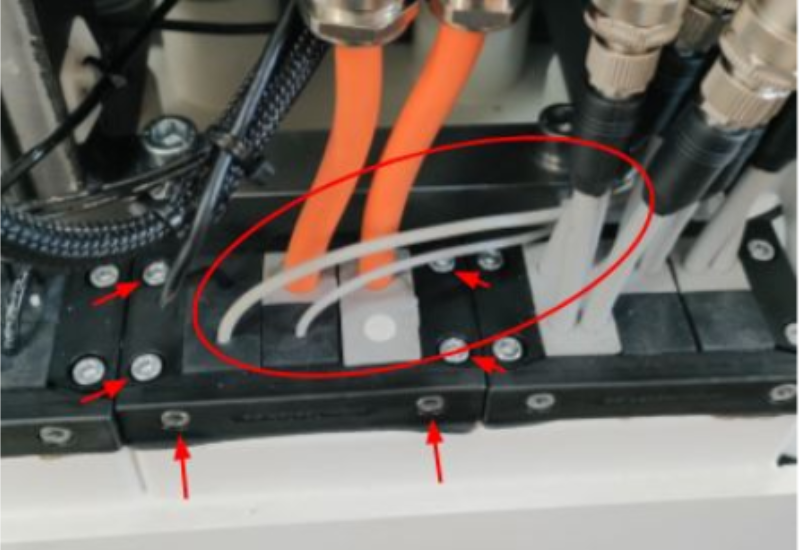
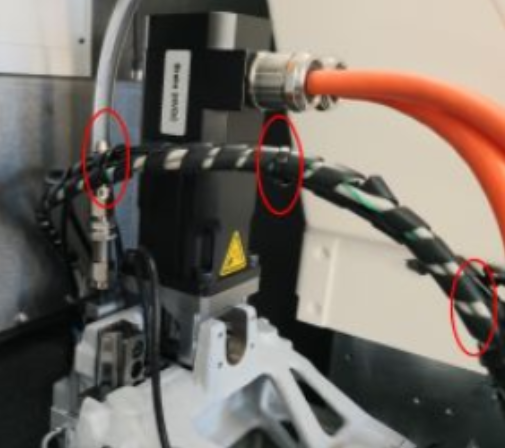
3. Cut the plastic flanges and remove the spiral sheath from the spindle's conductor and hose assembly.
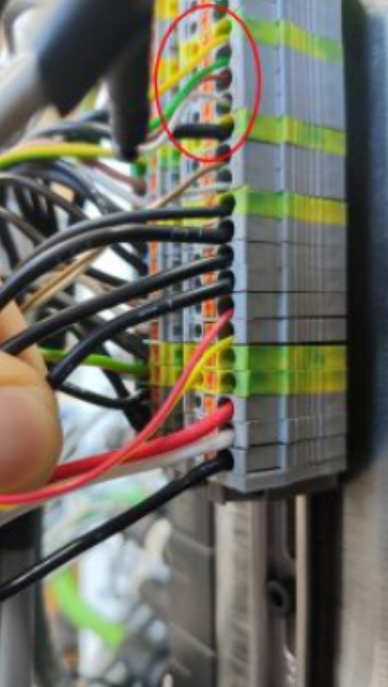
4. Locate and disconnect the spindle conductors on terminal block X5 terminals 11-12-13-PE+shield
Machining area
5. Remove the hoses from the heat sink.
6. Remove the complete heat sink
Remove the screws (2) from the spindle locking plate without removing the upper part (1) of the heatsink.

Rear part of the machining area
7. Remove the spindle from its housing by pulling it upwards (possibly with the help of a second person pushing it from the machining area) WITHOUT ROTATING IT IN ITS HOUSING.
8. Locate the pneumatic hoses and disconnect them.
9. Place the spindle on a stable support. Gently bundle the cables (e.g. in a plastic bag) to avoid damaging them. Carefully wrap the spindle and its documentation (certificates, etc.) in bubble wrap.
Assembly
1. Unpack and inspect the spindle (general condition, impacts, condition of conductors and connectors). Read the serial number (Kxxxx) and check that the certificate is attached to the spindle.
2. Make sure that the spindle housing and the entire machining area are clean and dry before installing the spindle.
3. Mark the direction of the spindle assembly. If necessary, make a mark with a felt pen on the front panel. DO NOT ROTATE THE SPINDLE IN ITS HOUSING. This mark must be oriented towards the front of the machine throughout the procedure. If necessary, call in a second person.
Rear part of the machining area
4. Connect the pneumatic hoses according to their function (V/ diagram)..
Machining area
6. Reassemble the heat sink loosely..
7. Position the spindle so that the distance between the bottom of the spindle housing and its end is = 17.5 mm

8. Tighten the spindle lock plate (1) and the heat sink (2) to 2.1 Nm.
9. Connect the power hoses to the heat sink..
Rear part of the machining area
10. Pass the connector through the feedthrough, routing the cable to the left of the terminal assembly.
11. Connect the spindle's power supply wires to terminal block X5, terminals XX XX XX according to the diagram.
12. Bundle the spindle's hoses and cables with spiral tubing and clamp the assembly. (If the MicroLubrication option is present, include the hose in the group).
13. Assemble the feedthrough.
14. Mount the rear cover of the machine.
Electrical cabinet
15. Connect the spindle plug to the signal converter box and lock it by turning the ring clockwise. Clamp the cable properly.
16. Close and lock the electrical cabinet.
17. Perform a spindle height correction. (link)
Checks, tests and trials
1. run in the spindle in accordance with the manufacturer's recommendations.
2. In any case, check normal operation (absence of suspicious noise, progressive heating limited to a maximum of 55 °C, etc.) by manually activating the rotation of the spindle in successive speed steps (10,000 - 60,000 rpm).
3. Check the spindle's direction of rotation (if necessary, attach a piece of tape to an empty tool holder and briefly move the spindle)
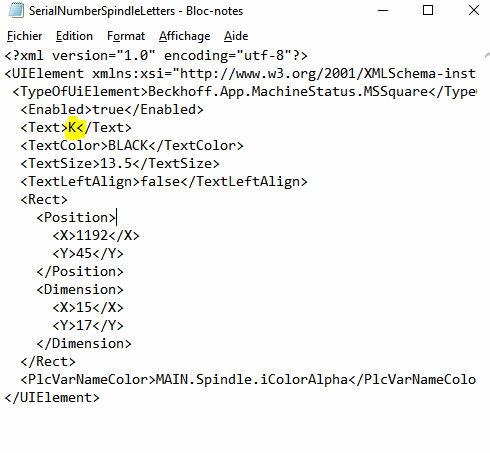
4. Update the spindle's serial number at the interface (HMI)
4.1 If necessary, modify the file to change the K to L for the spindle serial numbers:
Spindles with Lxxxx serial nos.
If necessary, modify the file to change the K to L for the spindle serial numbers:
path : .\HMI\System\MachineStatus_CNC
file : SerialNumberSpindleLetters.xml
There are no comments for now.