SCARA maintenance
SCARA maintenance
Composants du SCARA components
1st SCARA arm
SCARA cover
SCARA 2nd arm
Motor B3 (disk rotation)
Coupling pin
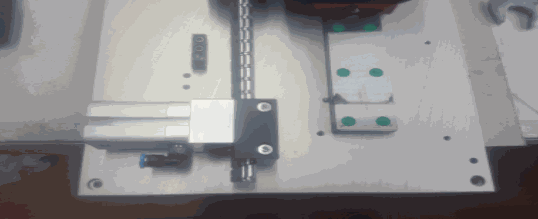
Guide rail
Z axis brake
Ballscrew
Z axis motor
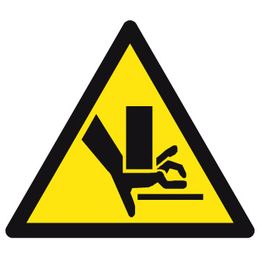
Z axis motor cover
Prerequisites before intervention
The machine must be in maintenance mode (power off).)
 .
.Rear cover removed
SCARA disabled and Z brake open
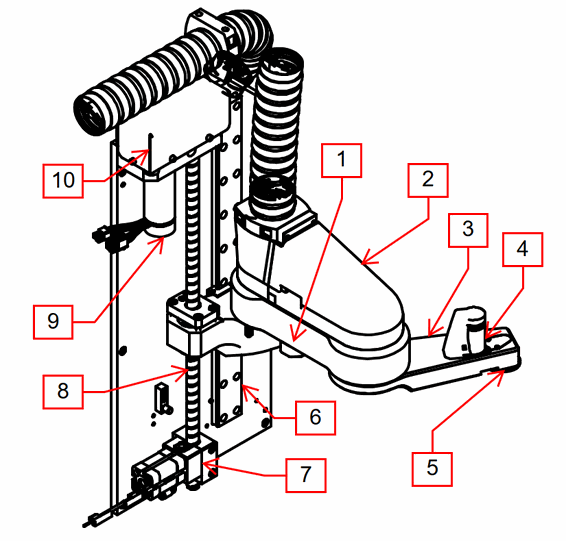
Caution
The SCARA can start moving automatically..
The forces and high inertia of the SCARA pose a risk of serious injury.
Never intervene or remove the guards without having secured the machine.
If it is necessary to conserve energy or to carry out movements when the guards are removed (functional tests, diagnostics, etc.), it is necessary to take additional appropriate safety measures (e.g. marking of the danger zone, wearing additional PPE, etc.). A full risk assessment must be conducted with the safety officer.

Precautions
Never remove the carriage from the guide rail. The 2 elements must not be disassembled. For rail replacement, the carriage is delivered pre-assembled and care must be taken that the carriage is not disassembled from the rail (e.g. by fixing temporary stops to the ends of the rail).
The guide rail must be kept clean during use. Use a soft, absorbent, lint-free cloth for cleaning.
Do not use solvents to clean the SCARA components..
Apply a light, even layer of grease to the contact surfaces, then manually move the component to its full extent and remove any excess grease with a cloth.
Regular maintenance
Clean and inspect the entire SCARA
Thoroughly clean the ballscrew and the guide rail and relubricate
Grease adapted for ballscrews (SCARA & NC): Klüber Isoflex NCA 15 grease
Grease adapted for ballscrews (SCARA & NC): Klüber Klüberplex BE 31-102 grease
Make movements by hand for each axis, check for noise, hard points, etc.
Remove any excess grease and put back into service

Replacing the SCARA Z axis drive belt
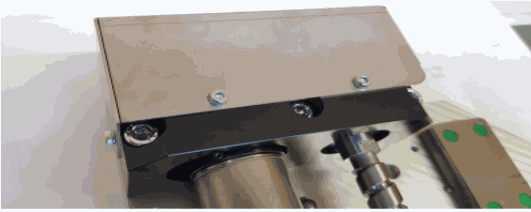
Remove the cover at the top of the SCARA assembly on the fixed part in order to access the Z transmission part.
Remove the motor by undoing the flange mounting screws.
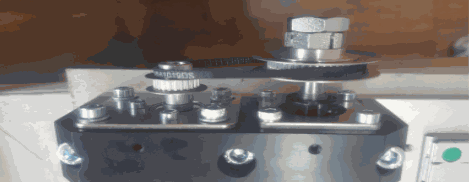
Remove the belt by passing it over the pulley flanges.
Reassembly is done by following the steps below in reverse order. The tightening torque of the motor flange mounting screws is 2.9 [Nm].
Restarting the SCARA
Replacing the B3 belt
Remove the motor and cover screws and carefully remove the motor by disengaging the belt pulley and removing the plate. Remove the belt.
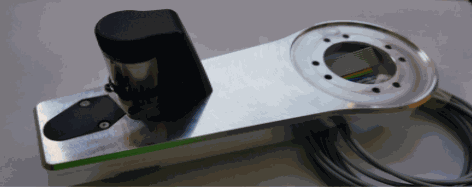

To reassemble, engage the belt on the disk side pulley, then offer up the motor and engage the motor pulley on the belt. Pre-tighten the motor mounting screws. Install the plate and tighten the screws to 0.22 [Nm]. Tension the belt by exerting lateral pressure on the motor towards the B2 joint. Tighten the motor mount to 0.58 [Nm].
Restarting the SCARA
Replacement of the brake band and the Z axis spring
Remove the brake assembly from the base plate by removing the 2 mounting screws.

Unscrew the 2 screws holding the rubber plate.. Unscrew the plunger screw, replace the spring and refit the plunger. Tighten the plunger screw to 1.2 [Nm].Refit the assembly in reverse order and tighten the brake mounting screws on the base plate to 2.9 [Nm].
Restarting the SCARA 
Recommissioning after intervention

Caution
Risk of collision
After any intervention on the SCARA, it is essential to perform referencing (homing): cancel the active referencing and restart complete referencing.
When recommissioning the machine after an intervention, pay particular attention to the operation of the machine.
Conduct test runs at reduced speed and keep the emergency stop button within easy reach.
There are no comments for now.